Design & General Process
Design your custom album with the blank templates.
Step 1 - DOWNLOAD & INSTALL THE ABPs TOOL
Download and install the ABPs Tool.
Step 2 - SET PHOTOSHOP COLOR SETTINGS
Ensure your color settings are set as follows prior to starting your design project.
Step 3 - CREATE BLANK TEMPLATES
Run the ABPs Tool and create blank templates for the product of choice.
Step 4 - DESIGN YOUR LAYOUT
Place images and design the layout.
• Color correct and soft proof your images prior to designing your layout. Learn more about Color.
• Color correct and soft proof your images prior to designing your layout. Learn more about Color.
Step 5 - SAVE & REVIEW PRINT READY FILES
Save high resolution JPG files of each layout, and review at 100% scale for accuracy, quality, color & typographical errors prior to placing an order.
Step 6 - PLACE ORDER
Upload JPG files to sync with the AlbumLayout Proofing website or continue to place order by following the steps found in Export, Proof & Order.
Step 7 - SYNC WITH THE ALBUMLAYOUT PROOFING WEBSITE
Optional Step - Upload your album layout to the AlbumLayout Proofing website to share with your clients and get their approval. You can also download a slideshow version of your layout (MP4) to share and post on your website and social media channels. Refer to the AlbumLayout Proofing website User Guide for instructions.
Step 1 - CREATE BLANK TEMPLATES
All files specific to the product of choice will be created in a .psd format. Each set of blank template is set up with the appropriate size, resolution, color space, filename, and guide locations. Do not change any of the template specifications, including file names.
Learn more about the blank templates in Layout Tips.
Learn more about the blank templates in Layout Tips.
- Launch Photoshop
- Go to File > Scripts > ABPs Tool 1.2.4.02
- Review the message dialog box.
- Click Close when you are finished.
- Click New Blank Templates on the control panel.
- Select the product details and click OK.
- Create or select an existing folder to save the templates to and click Open.
Blank templates (PSD files) will be created and placed in the selected folder. Creating templates may take a few minutes depending on the type of product, product details and computer speed.
Step 2 - DESIGN
Design a custom layout.
- Open each PSD template file in Photoshop to design your layout.
- Place images onto the blank template.
- Size and position at desired location.
- Add text, sloppy borders, masks, illustrations, background color, and apply any other image effects.
- Save your layered files as .psd.
Step 3 - SAVE JPG FILES
Once your layout is complete, save a high resolution JPG of each file by following the steps found in Export, Proof & Order.
Step 4 - PLACE ORDER
Upload JPG files to sync with the AlbumLayout Proofing website or continue to place order by following the steps found in Export, Proof & Order.
LAYOUT TIPS
Click on the product name to expand or collapse, and read an explanation of included files with each set of blank templates, as well as layout tips.
NeoClassic Book™
Download - Files for a Faux Leather Or Other Materials Cover
- 000001.psd - First single page
- 002003.psd - Pages 2-3 or Spread
- .....
- 008009.psd - Pages 8-9 or Spread
- 010000.psd - Last single page
- sleeve-box.psd - Case file
Download - Files For A Designable Cover
- 000000.psd - Cover file
- 000001.psd - First single page
- 002003.psd - Pages 2-3 or Spread
- .....
- 008009.psd - Pages 8-9 or Spread
- 010000.psd - Last single page
- sleeve-box.psd - Case file
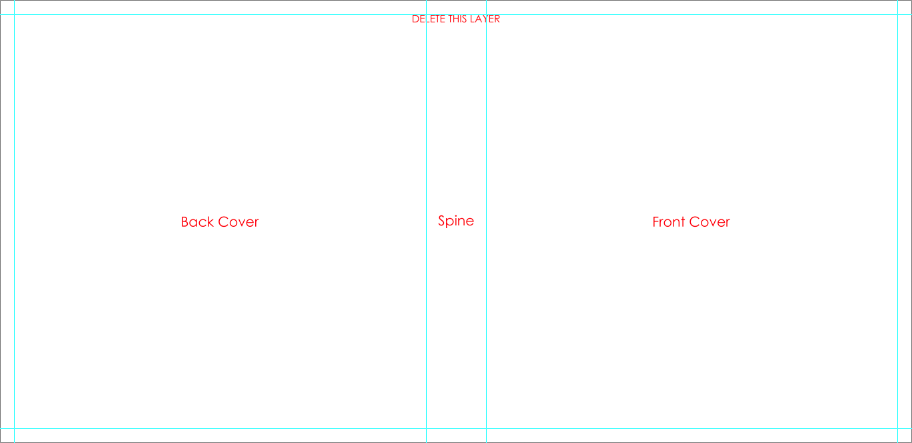
Tip - Designable Presentation Box
- The template includes an instructional layer, along with fold and spine guides. Turn off or delete this layer before saving your JPEG file.
- Consider the direction of any spine text based on how the album will be stored ( vertically or lay flat ).
- Place images past the fold guide and aligned with canvas edge for a full bleed effect, or at least 1/4 inch away from the fold guides for a no-bleed effect.
- Place text/logo at least 1/4 inch away from the fold guides.

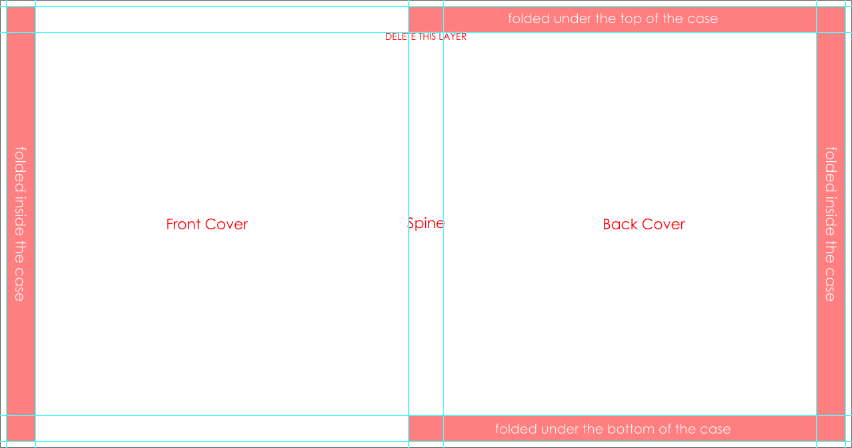
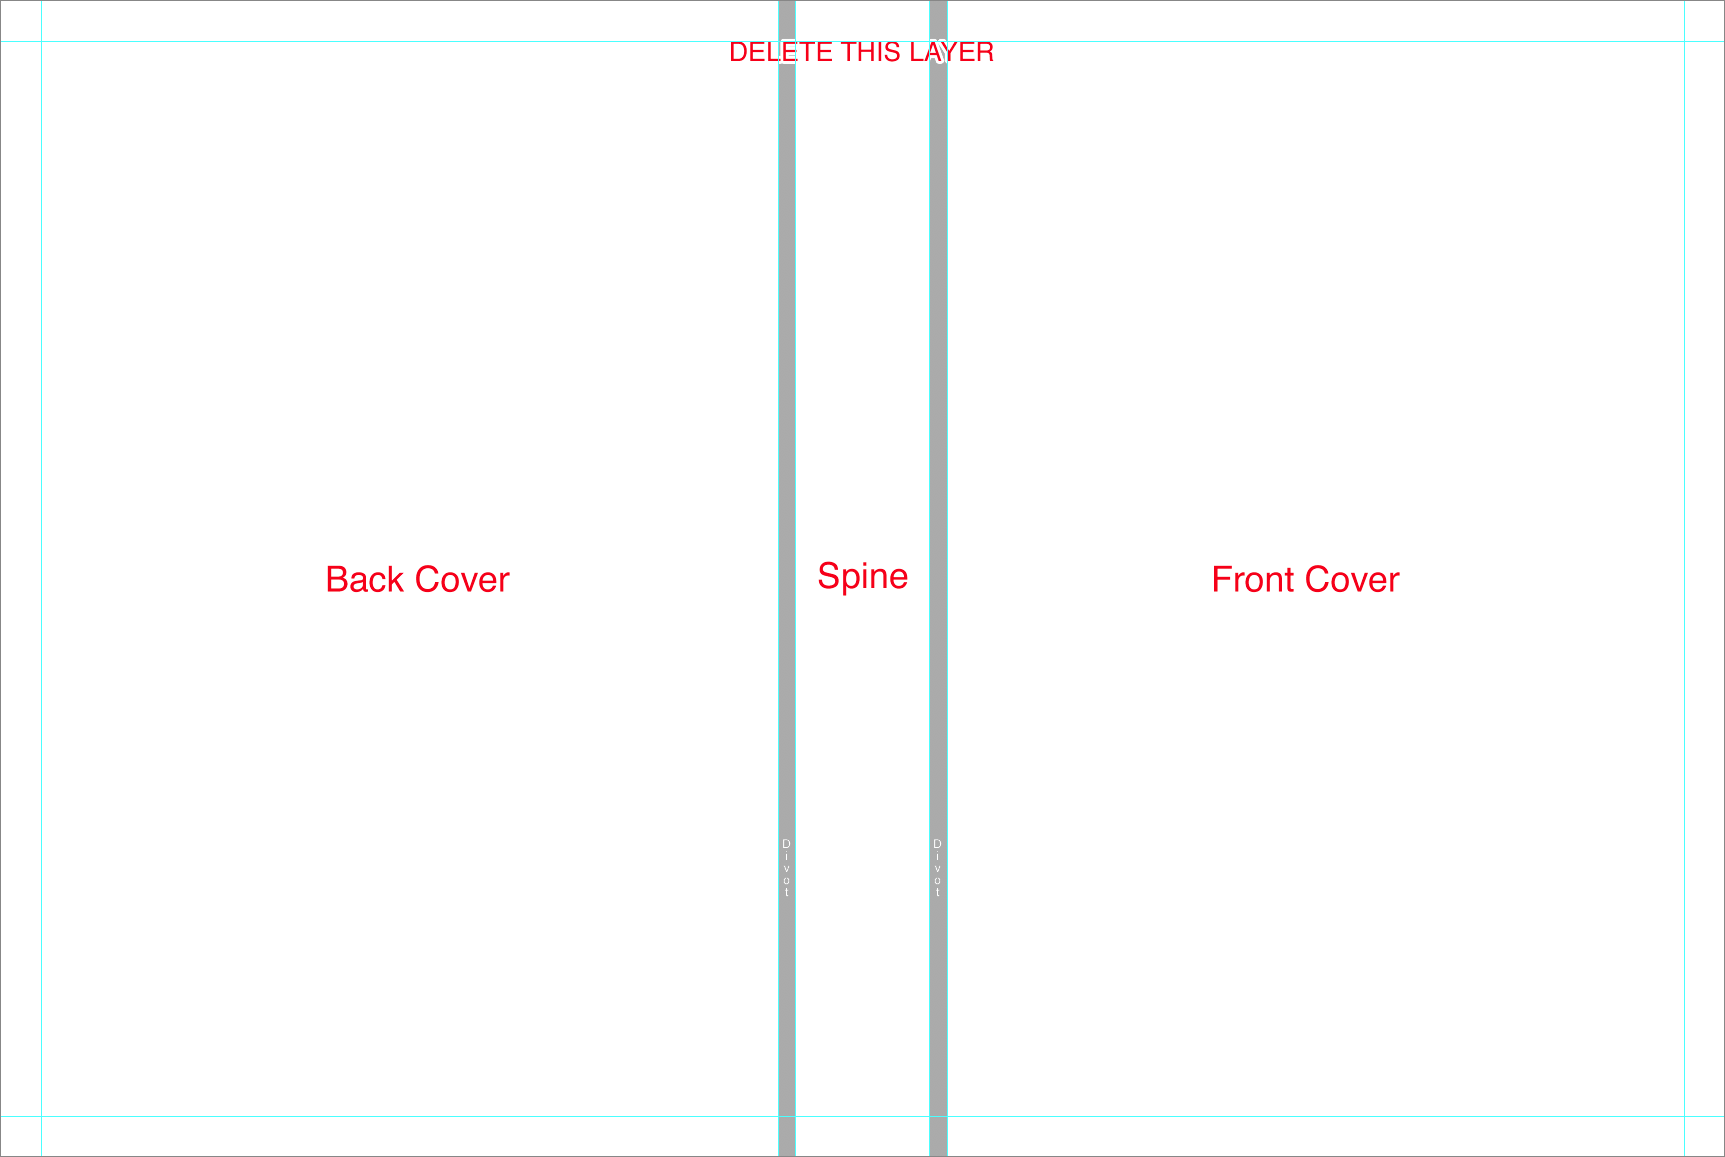
Tip - Designable Cover
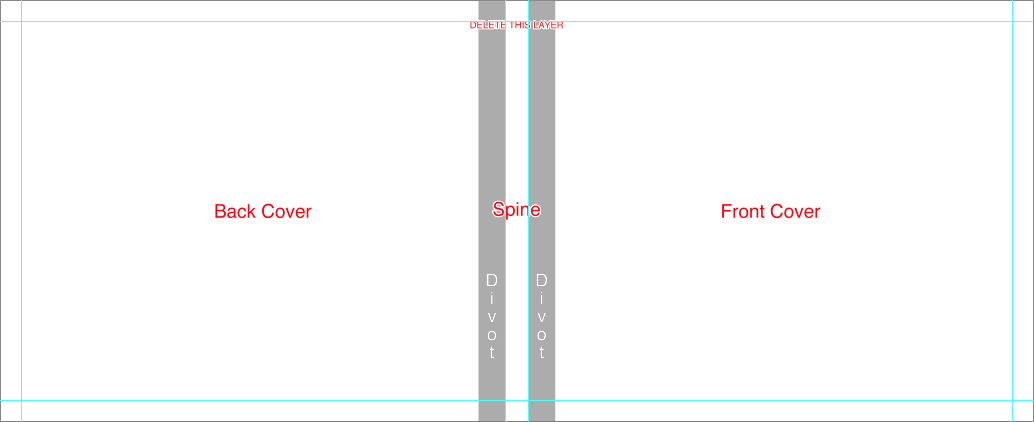
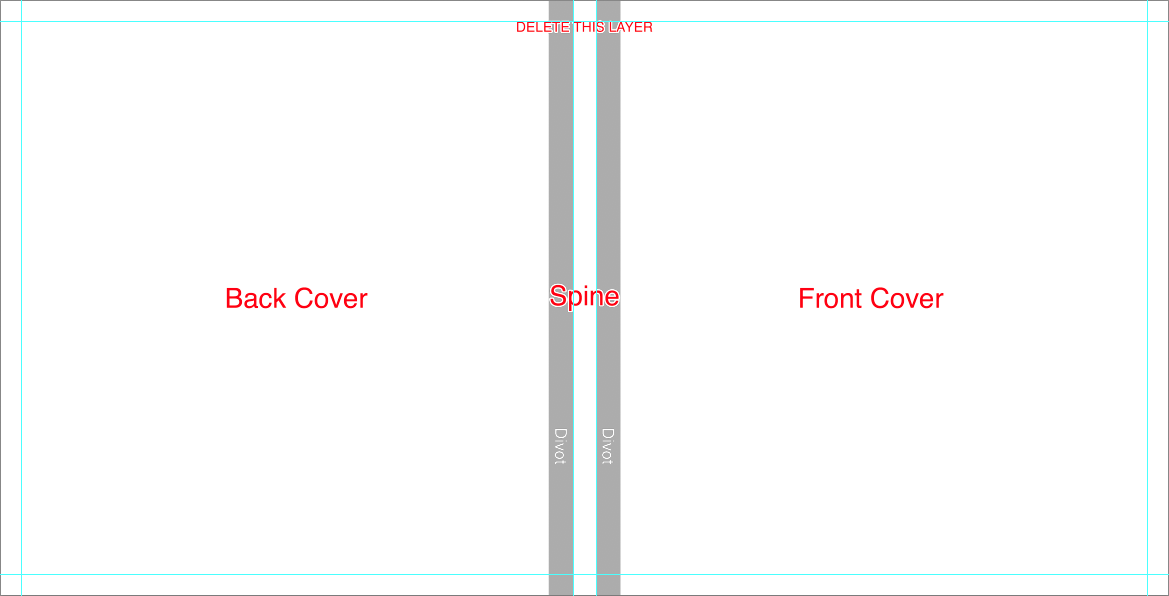
- The template includes an instructional layer, along with fold and spine guides. Turn off or delete this layer before saving your JPEG file.
- The divot is marked by guidelines or a shaded area. It is not recommended to place text, or important parts of an image, on or near the divot area.
- Consider the direction of any spine text based on how the album will be stored ( vertically or lay flat ).
- Place images past the fold guide and aligned with canvas edge for a full bleed effect, or at least 1/4 inch away from the fold guides for a no-bleed effect.
- Place text/logo at least 1/4 inch away from the fold guides.
Tip - Pages
- The templates include the center guide and trim guides.
- Place images past the trim guides for a full-bleed effect, or at least 1/4 inch away from the trim guides for a no-bleed effect.
- Place text/logo at least 1/4 inch away from the trim guides.
- Do not align images with trim guide.

Crystal
Download - Files for a Crystal and Crystal Board
- 000001.psd - First single page
- 002003.psd - Pages 2-3 or Spread
- .....
- 008009.psd - Pages 8-9 or Spread
- 010000.psd - Last single page
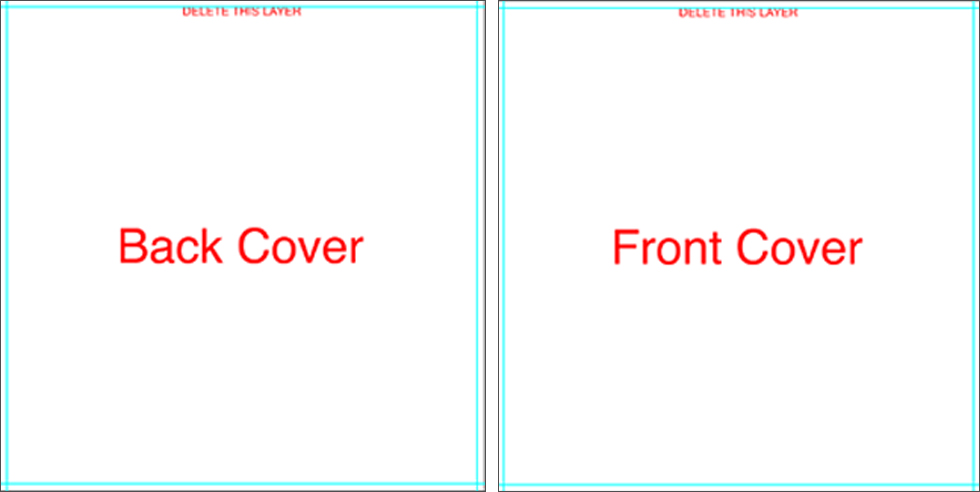
- back-cover.psd - Back Cover file
- front-cover.psd - Front Cover file
- vellum.psd - Vellum file
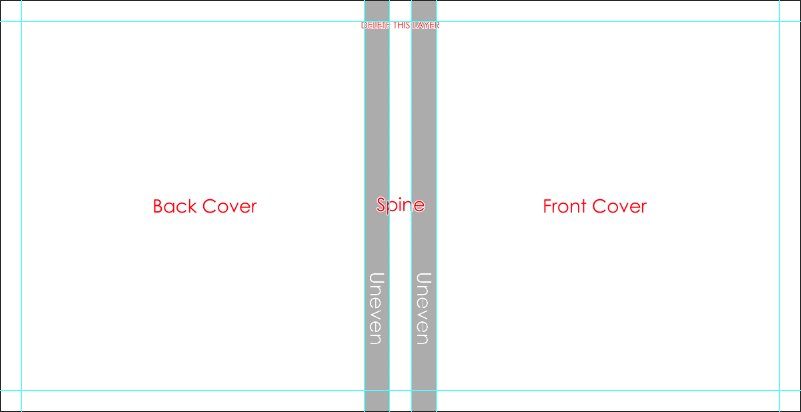
Tip - Designable Cover
- The templates include an instructional layer, along with trim guides. Turn off or delete this layer before saving your JPEG file.
- Place images past the trim guides and aligned with canvas edge for a full bleed effect, or at least 1/4 inch away from the trim guides for a no-bleed effect.
- Place text/logo at least 1/4 inch away from the trim guides.
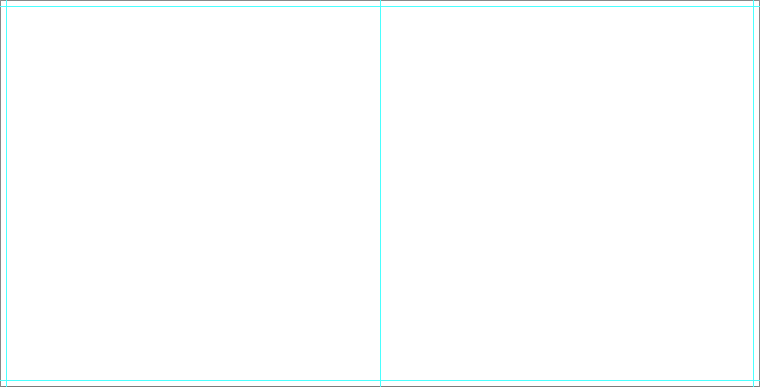
Tip - Vellum & Pages
- The templates include the center guide and trim guides.
- Place images past the trim guides for a full-bleed effect, or at least 1/4 inch away from the trim guides for a no-bleed effect.
- Place text/logo at least 1/4 inch away from the trim guides.
- Do not align images with trim guide.
Heirloom
Download - Files for an Heirloom
- 000001.psd - First single page
- 002003.psd - Pages 2-3 or Spread
- .....
- 008009.psd - Pages 8-9 or Spread
- 010000.psd - Last single page
Tip - Pages
- The templates include the center guide and trim guides.
- Place images past the trim guides for a full-bleed effect, or at least 1/4 inch away from the trim guides for a no-bleed effect.
- Place text/logo at least 1/4 inch away from the trim guides.
- Do not align images with trim guide.
Art Layflat
Download - Files for an Art Layflat
- 000000.psd - Cover file
- 000001.psd - First single page
- 002003.psd - Pages 2-3 or Spread
- .....
- 008009.psd - Pages 8-9 or Spread
- 010000.psd - Last single page
- Art-box.psd - Case file
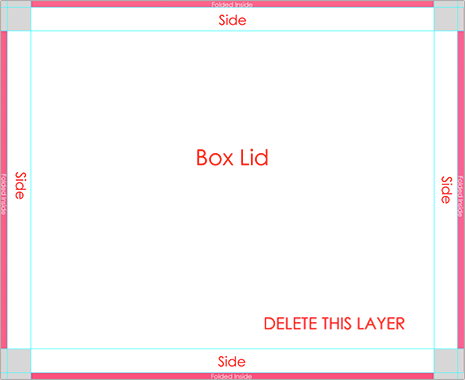
Tip - Designable Box Top
- The template includes an instructional layer, along with fold and spine guides. Turn off or delete this layer before saving your JPEG file.
- Place images past the fold guide and aligned with canvas edge for a full bleed effect, or at least 1/4 inch away from the trim guides for a no-bleed effect.
- Place text/logo at least 1/4 inch away from the fold guides.
Tip - Designable Cover
- The template includes an instructional layer, along with fold and spine guides. Turn off or delete this layer before saving your JPEG file.
- The divot is marked by guidelines or a shaded area. It is not recommended to place text, or important parts of an image, on or near the divot area.
- Consider the direction of any spine text based on how the album will be stored ( vertically or lay flat ).
- Place images past the fold guide and aligned with canvas edge for a full bleed effect, or at least 1/4 inch away from the fold guides for a no-bleed effect.
- Place text/logo at least 1/4 inch away from the fold guides.
Tip - Pages
- The templates include the center guide and trim guides.
- Place images past the trim guides for a full-bleed effect, or at least 1/4 inch away from the trim guides for a no-bleed effect.
- Place text/logo at least 1/4 inch away from the trim guides.
- Do not align images with trim guide.

Art Soft Cover
Download - Files for an Art Soft Cover
- 000000.psd - Cover file
- 001002.psd - Pages 1-2 or Spread
- 002003.psd - Pages 2-3 or Spread
- .....
- 009010.psd - Pages 9-10 or Spread
- Art-box.psd - Case file
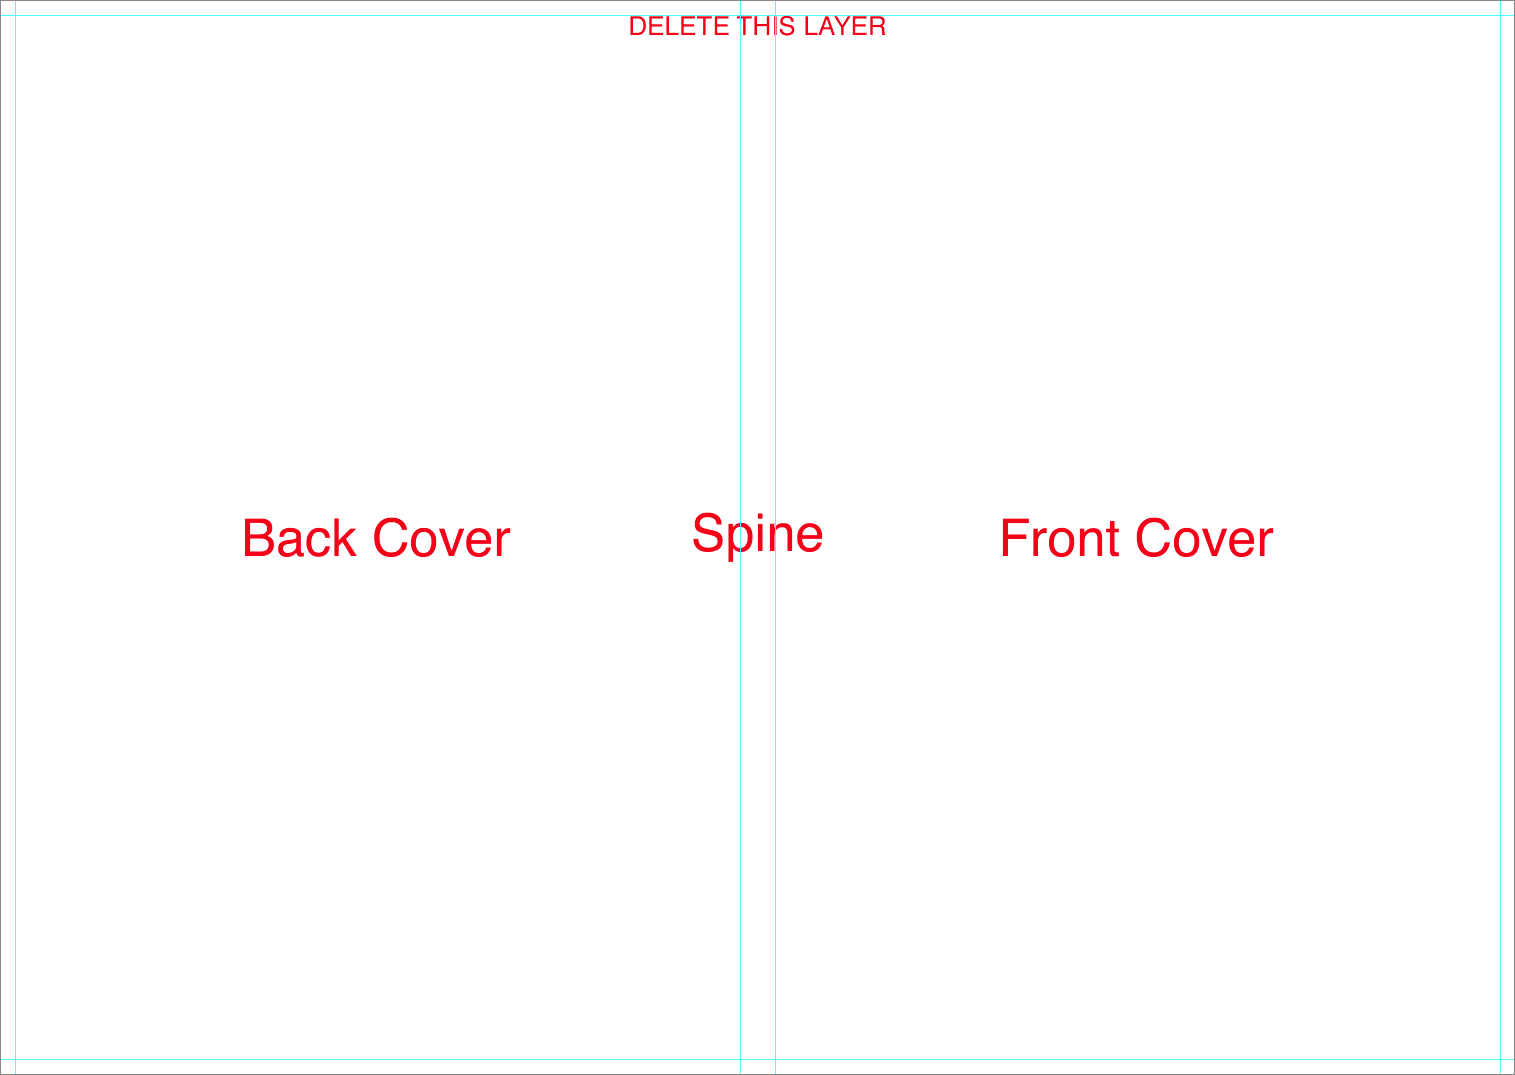
Tip - Designable Cover
- The template includes an instructional layer, along with trim guides. Turn off or delete this layer before saving your JPEG file.
- Consider the direction of any spine text based on how the album will be stored ( vertically or lay flat ).
- Place images past the trim guides and aligned with canvas edge for a full bleed effect, or at least 1/4 inch away from the fold guides for a no-bleed effect.
- Place text/logo at least 1/4 inch away from the trim guides.
Tip - Pages
- The templates include the center guide and trim guides.
- Place images past the trim guides for a full-bleed effect, or at least 1/4 inch away from the trim guides for a no-bleed effect.
- Place text/logo at least 1/4 inch away from the trim guides.
- Do not align images with trim guide.
Zen Layflat Impact X
Download - Files for a Zen Layflat Impact X
- 000000.psd - Case file
- 000001.psd - First single page
- 002003.psd - Pages 2-3 or Spread
- .....
- 008009.psd - Pages 8-9 or Spread
- 010000.psd - Last single page
Tip - Designable Presentation Box
- The template includes an instructional layer, along with fold and spine guides. Turn off or delete this layer before saving your JPEG file.
- Consider the direction of any spine text based on how the album will be stored ( vertically or lay flat ).
- Place images past the fold guide and aligned with canvas edge for a full bleed effect, or at least 1/4 inch away from the trim guides for a no-bleed effect.
- Place text/logo at least 1/4 inch away from the fold guides.
Tip - Pages
- The templates include the center guide and trim guides.
- Place images past the trim guides for a full-bleed effect, or at least 1/4 inch away from the trim guides for a no-bleed effect.
- Place text/logo at least 1/4 inch away from the trim guides.
- Do not align images with trim guide.

Zen Layflat Impact
Download - Files For A Zen Layflat Impact
- 000000.psd - Case file
- 000001.psd - First single page
- 002003.psd - Pages 2-3 or Spread
- .....
- 008009.psd - Pages 8-9 or Spread
- 010000.psd - Last single page
Tip - Designable Presentation Box
- The template includes an instructional layer, along with fold and spine guides. Turn off or delete this layer before saving your JPEG file.
- Consider the direction of any spine text based on how the album will be stored ( vertically or lay flat ).
- Place images past the fold guide and aligned with canvas edge for a full bleed effect, or at least 1/4 inch away from the trim guides for a no-bleed effect.
- Place text/logo at least 1/4 inch away from the fold guides.
Tip - Pages
- The templates include the center guide and trim guides.
- Place images past the trim guides for a full-bleed effect, or at least 1/4 inch away from the trim guides for a no-bleed effect.
- Place text/logo at least 1/4 inch away from the trim guides.
- Do not align images with trim guide.
Zen Layflat EXD
Download - Files For A Zen Layflat EXD
- 000000.psd - Cover file
- 000001.psd - First single page
- 002003.psd - Pages 2-3 or Spread
- .....
- 008009.psd - Pages 8-9 or Spread
- 010000.psd - Last single page
- excase.psd - Case file
Tip - Designable Slide-In Case
- The template includes an instructional layer, along with fold and spine guides. Turn off or delete this layer before saving your JPEG file.
- Consider the direction of any spine text based on how the album will be stored ( vertically or lay flat ).
- Place images past the fold guide and aligned with canvas edge for a full bleed effect, or at least 1/4 inch away from the trim guides for a no-bleed effect.
- Place text/logo at least 1/4 inch away from the fold guides.
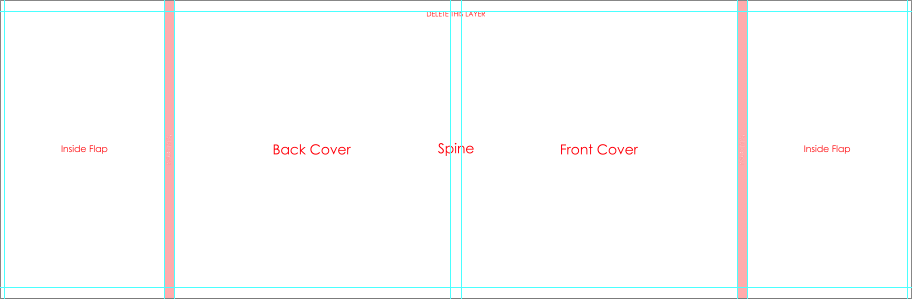
Designable Cover & Jacket
- The template includes an instructional layer, along with fold and spine guides. Turn off or delete this layer before saving your JPEG file.
- The divot is marked by guidelines or a shaded area. It is not recommended to place text, or important parts of an image, on or near the divot area.
- Consider the direction of any spine text based on how the album will be stored ( vertically or lay flat ).
- Place images past the fold and trim guides and aligned with canvas edge for a full bleed effect, or at least 1/4 inch away from the fold and trim guides for a no-bleed effect.
- Place text/logo at least 1/4 inch away from the fold guides.
Tip - Pages
- The templates include the center guide and trim guides.
- Place images past the trim guides for a full-bleed effect, or at least 1/4 inch away from the trim guides for a no-bleed effect.
- Place text/logo at least 1/4 inch away from the trim guides.
- Do not align images with trim guide.
Zen Layflat EX
Download - Files For A Zen Layflat EX
- 000000.psd - Cover file
- 000001.psd - First single page
- 002003.psd - Pages 2-3 or Spread
- .....
- 008009.psd - Pages 8-9 or Spread
- 010000.psd - Last single page
Tip - Designable Cover & Jacket
- The template includes an instructional layer, along with fold and spine guides. Turn off or delete this layer before saving your JPEG file.
- The divot is marked by guidelines or a shaded area. It is not recommended to place text, or important parts of an image, on or near the divot area.
- Consider the direction of any spine text based on how the album will be stored ( vertically or lay flat ).
- Place images past the fold guide and aligned with canvas edge for a full bleed effect, or at least 1/4 inch away from the fold guides for a no-bleed effect.
- Place text/logo at least 1/4 inch away from the fold guides.
Tip - Pages
- The templates include the center guide and trim guides.
- Place images past the trim guides for a full-bleed effect, or at least 1/4 inch away from the trim guides for a no-bleed effect.
- Place text/logo at least 1/4 inch away from the trim guides.
- Do not align images with trim guide.
Zen Layflat Hard Cover
Download - Files For A Zen Layflat Hard Cover
- 000000.psd - Cover file
- 000001.psd - First single page
- 002003.psd - Pages 2-3 or Spread
- .....
- 008009.psd - Pages 8-9 or Spread
- 010000.psd - Last single page
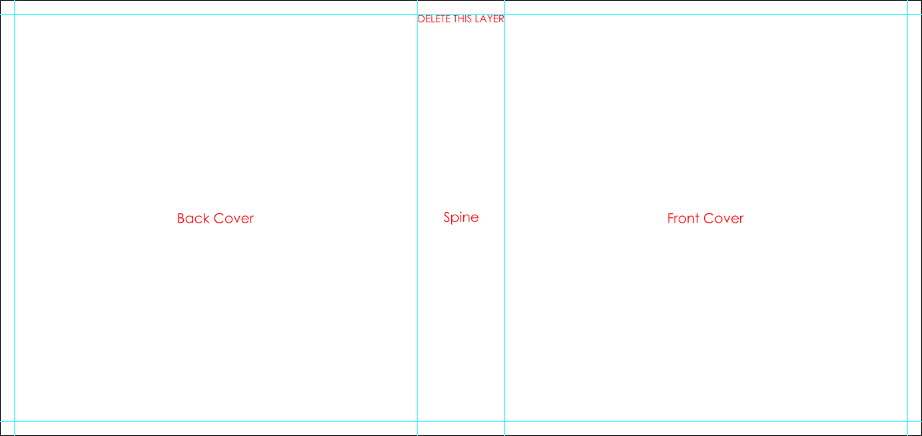
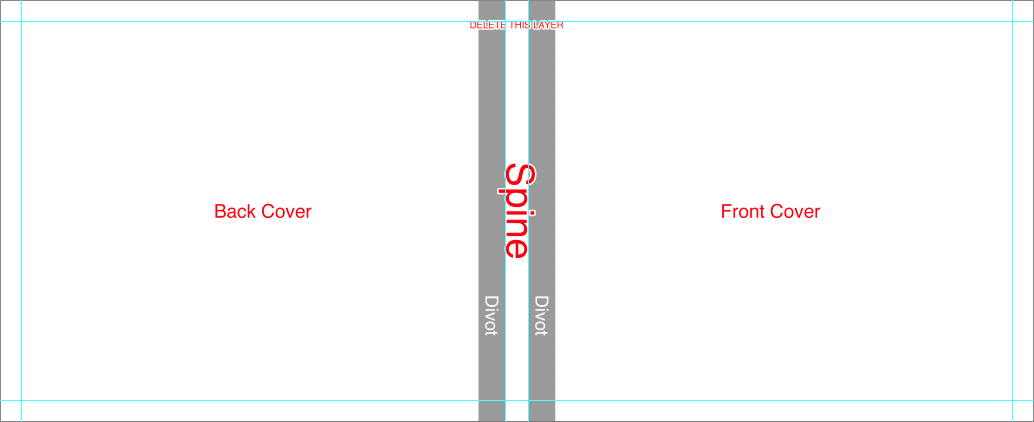
Tip - Designable Cover
- The template includes an instructional layer, along with fold and spine guides. Turn off or delete this layer before saving your JPEG file.
- The divot is marked by guidelines or a shaded area. It is not recommended to place text, or important parts of an image, on or near the divot area.
- Consider the direction of any spine text based on how the album will be stored ( vertically or lay flat ).
- Place images past the fold guide and aligned with canvas edge for a full bleed effect, or at least 1/4 inch away from the fold guides for a no-bleed effect.
- Place text/logo at least 1/4 inch away from the fold guides.

Tip - Pages
- The templates include the center guide and trim guides.
- Place images past the trim guides for a full-bleed effect, or at least 1/4 inch away from the trim guides for a no-bleed effect.
- Place text/logo at least 1/4 inch away from the trim guides.
- Do not align images with trim guide.
Book Bound LX & FLX
Download - Files For A Book Bound LX & FLX
- 000000.psd - Case file
- 000001.psd - First single page
- 002003.psd - Pages 2-3 or Spread
- .....
- 018019.psd - Pages 8-9 or Spread
- 020000.psd - Last single page
Tip - Designable Presentation Box
- The template includes an instructional layer, along with fold and spine guides. Turn off or delete this layer before saving your JPEG file.
- Consider the direction of any spine text based on how the album will be stored ( vertically or lay flat ).
- Place images past the fold guide and aligned with canvas edge for a full bleed effect, or at least 1/4 inch away from the trim guides for a no-bleed effect.
- Place text/logo at least 1/4 inch away from the fold guides.
Tip - Pages
- The templates include the center guide and trim guides.
- Place images past the trim guides for a full-bleed effect, or at least 1/4 inch away from the trim guides for a no-bleed effect.
- Place text/logo at least 1/4 inch away from the trim guides.
- Do not align images with trim guide.

Book Bound EXD
Download - Files for a Book Bound EXD
- 000000.psd - Cover file
- 000001.psd - First single page
- 002003.psd - Pages 2-3 or Spread
- .....
- 018019.psd - Pages 8-9 or Spread
- 020000.psd - Last single page
- excase.psd - Case file
Tip - Designable Slide-In Case
- The template includes an instructional layer, along with fold and spine guides. Turn off or delete this layer before saving your JPEG file.
- Consider the direction of any spine text based on how the album will be stored ( vertically or lay flat ).
- Place images past the fold guide and aligned with canvas edge for a full bleed effect, or at least 1/4 inch away from the trim guides for a no-bleed effect.
- Place text/logo at least 1/4 inch away from the fold guides.
Tip - Designable Cover & Jacket
- The template includes an instructional layer, along with fold and spine guides. Turn off or delete this layer before saving your JPEG file.
- The divot is marked by guidelines or a shaded area. It is not recommended to place text, or important parts of an image, on or near the divot area.
- Consider the direction of any spine text based on how the album will be stored ( vertically or lay flat ).
- Place images past the fold and trim guides and aligned with canvas edge for a full bleed effect, or at least 1/4 inch away from the fold and trim guides for a no-bleed effect.
- Place text/logo at least 1/4 inch away from the fold guides.
Tip - Pages
- The templates include the center guide and trim guides.
- Place images past the trim guides for a full-bleed effect, or at least 1/4 inch away from the trim guides for a no-bleed effect.
- Place text/logo at least 1/4 inch away from the trim guides.
- Do not align images with trim guide.
Book Bound EX
Download - Files For A Book Bound EX
- 000000.psd - Cover file
- 000001.psd - First single page
- 002003.psd - Pages 2-3 or Spread
- .....
- 018019.psd - Pages 8-9 or Spread
- 020000.psd - Last single page
Tip - Designable Cover & Jacket
- The template includes an instructional layer, along with fold and spine guides. Turn off or delete this layer before saving your JPEG file.
- The divot is marked by guidelines or a shaded area. It is not recommended to place text, or important parts of an image, on or near the divot area.
- Consider the direction of any spine text based on how the album will be stored ( vertically or lay flat ).
- Place images past the fold and trim guides and aligned with canvas edge for a full bleed effect, or at least 1/4 inch away from the fold and trim guides for a no-bleed effect.
- Place text/logo at least 1/4 inch away from the fold guides.
Tip - Pages
- The templates include the center guide and trim guides.
- Place images past the trim guides for a full-bleed effect, or at least 1/4 inch away from the trim guides for a no-bleed effect.
- Place text/logo at least 1/4 inch away from the trim guides.
- Do not align images with trim guide.
Book Bound Hard Cover
Download - Files For A Book Bound Hard Cover
- 000000.psd - Cover file
- 000001.psd - First single page
- 002003.psd - Pages 2-3 or Spread
- .....
- 018019.psd - Pages 8-9 or Spread
- 020000.psd - Last single page
Tip - Designable Cover
- The template includes an instructional layer, along with fold and spine guides. Turn off or delete this layer before saving your JPEG file.
- The divot is marked by guidelines or a shaded area. It is not recommended to place text, or important parts of an image, on or near the divot area.
- Consider the direction of any spine text based on how the album will be stored ( vertically or lay flat ).
- Place images past the fold guide and aligned with canvas edge for a full bleed effect, or at least 1/4 inch away from the fold guides for a no-bleed effect.
- Place text/logo at least 1/4 inch away from the fold guides.
Tip - Pages
- The templates include the center guide and trim guides.
- Place images past the trim guides for a full-bleed effect, or at least 1/4 inch away from the trim guides for a no-bleed effect.
- Place text/logo at least 1/4 inch away from the trim guides.
- Do not align images with trim guide.
Book Bound Soft Cover
Download - Files For A Book Bound Soft Cover
- 000000.psd - Cover file
- 000001.psd - First single page
- 002003.psd - Pages 2-3 or Spread
- .....
- 018019.psd - Pages 8-9 or Spread
- 020000.psd - Last single page
Tip - Designable Cover
- The template includes an instructional layer, along with trim and spine guides. Turn off or delete this layer before saving your JPEG file.
- Consider the direction of any spine text based on how the album will be stored ( vertically or lay flat ).
- Place images past the trim guide and aligned with canvas edge for a full bleed effect, or at least 1/4 inch away from the fold guides for a no-bleed effect.
- Place text/logo at least 1/4 inch away from the trim guides.
Tip - Pages
- The templates include the center guide and trim guides.
- Place images past the trim guides for a full-bleed effect, or at least 1/4 inch away from the trim guides for a no-bleed effect.
- Place text/logo at least 1/4 inch away from the trim guides.
- Do not align images with trim guide.
Vista Layflat
Download - Files for a Vista Layflat
- 000000.psd - Cover file
- 001002.psd - Pages 1-2 or Spread
- 003004.psd - Pages 3-4 or Spread
- .....
- 009010.psd - Pages 9-10 or Spread
- 011012.psd - Pages 11-12 or Spread
Tip - Designable Cover
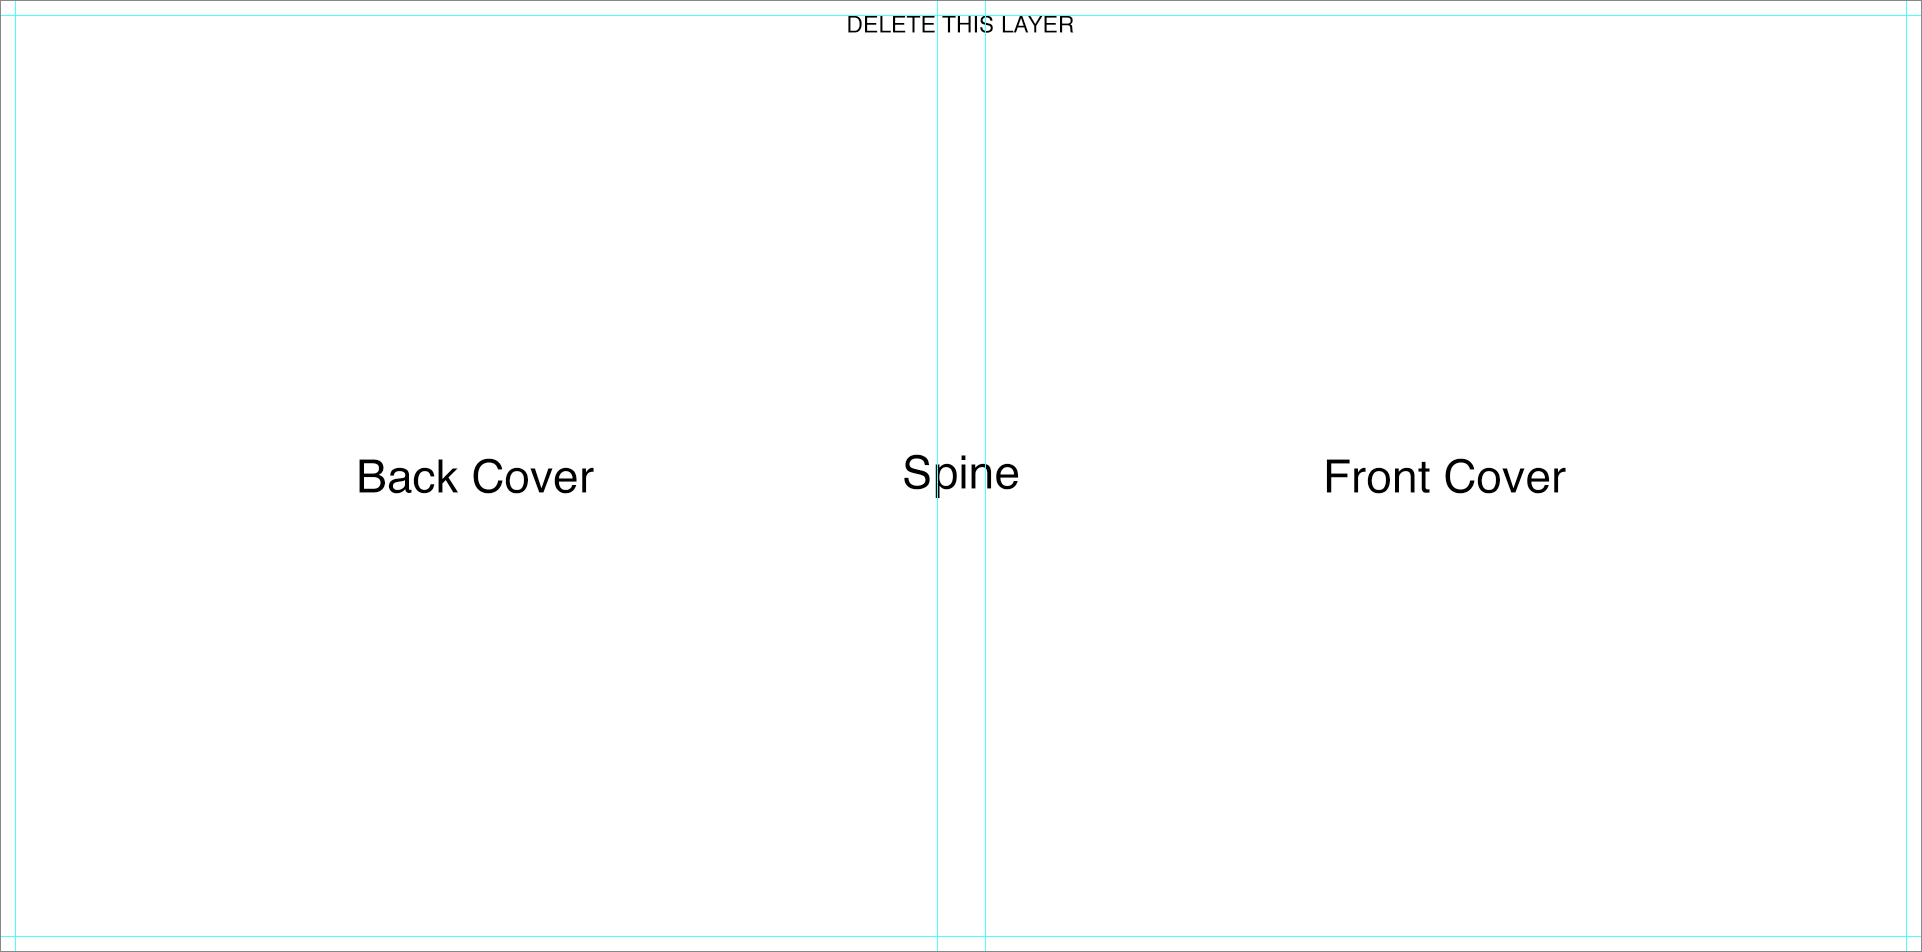
- The template includes an instructional layer, along with fold and spine guides. Turn off or delete this layer before saving your JPEG file.
- The divot is marked by guidelines or a shaded area. It is not recommended to place text, or important parts of an image, on or near the divot area.
- Consider the direction of any spine text based on how the album will be stored ( vertically or lay flat ).
- Place images past the fold guide and aligned with canvas edge for a full bleed effect, or at least 1/4 inch away from the fold guides for a no-bleed effect.
- Place text/logo at least 1/4 inch away from the fold guides.

Tip - Pages
- The templates include the center guide and trim guides.
- Place images past the trim guides for a full-bleed effect, or at least 1/4 inch away from the trim guides for a no-bleed effect.
- Place text/logo at least 1/4 inch away from the trim guides.
- Do not align images with trim guide.

Curve
Download - Files for a Curve
- 000000.psd - Cover file
- 001002.psd - Pages 1-2 or Spread
- 003004.psd - Pages 3-4 or Spread
- .....
- 009010.psd - Pages 9-10 or Spread
- 011012.psd - Pages 11-12 or Spread
Tip - Designable Cover
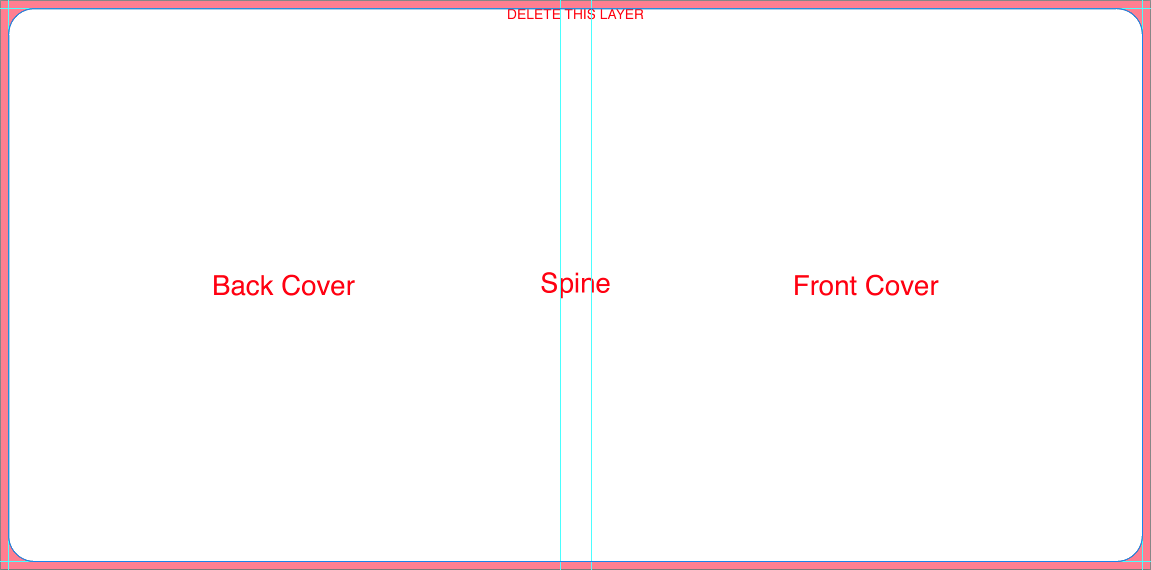
- The template includes an instructional layer, along with trim and spine guides. Turn off or delete this layer before saving your JPEG file.
- Consider the direction of any spine text based on how the album will be stored ( vertically or lay flat ).
- Place images past the fold guide and aligned with canvas edge for a full bleed effect, or at least 1/4 inch away from the fold guides for a no-bleed effect.
- Place text/logo at least 1/4 inch away from the trim guides.
Tip - Pages
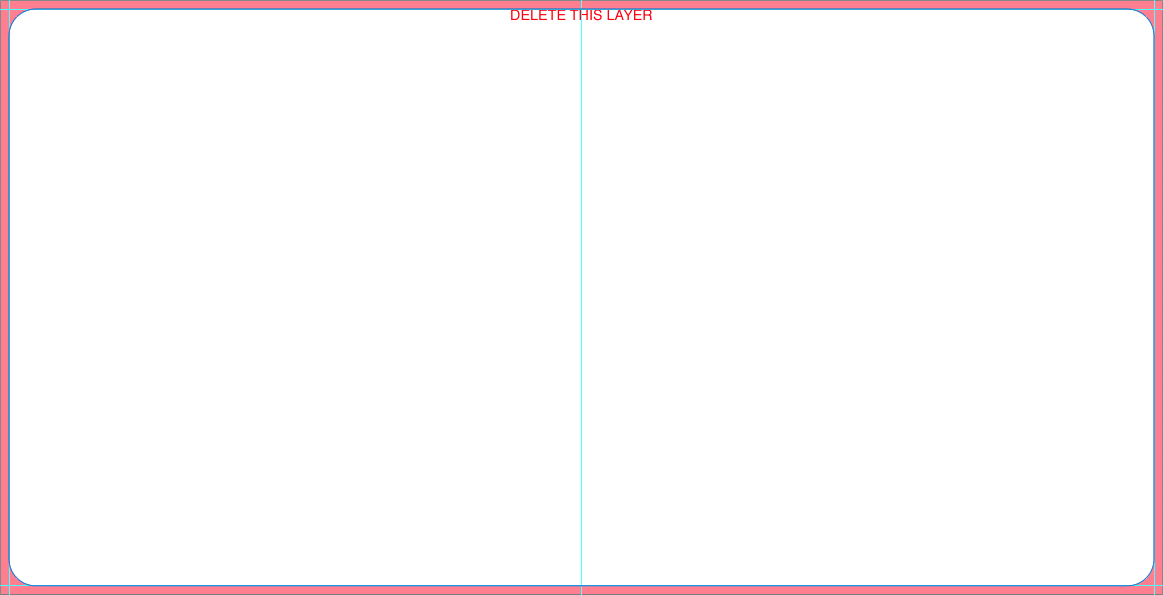
- The template includes an instructional layer, along with trim and center guides. Turn off or delete this layer before saving your JPEG file.
- Place images past the trim guides for a full-bleed effect, or at least 1/4 inch away from the trim guides for a no-bleed effect.
- Place text/logo at least 1/4 inch away from the trim guides.
- Do not align images with trim guide.
Presentation Books
Download - Files for Presentation Book
- 000000.psd - Cover file
- 000001.psd - First single page
- 002003.psd - Pages 2-3 or Spread
- .....
- 010011.psd - Pages 10-11 or Spread
- 012000.psd - Last single page
- USB-cover.psd - Media Holder Cover
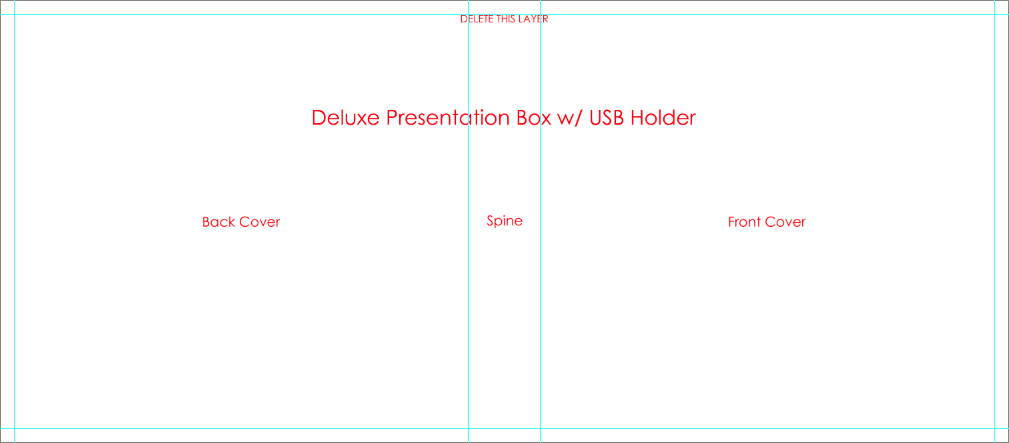
Tip - Designable Media Holder
- The template includes an instructional layer, along with fold and spine guides. Turn off or delete this layer before saving your JPEG file.
- Consider the direction of any spine text based on how the album will be stored ( vertically or lay flat ).
- Place images past the fold guide and aligned with canvas edge for a full bleed effect, or at least 1/4 inch away from the fold guides for a no-bleed effect.
- Place text/logo at least 1/4 inch away from the trim guides.
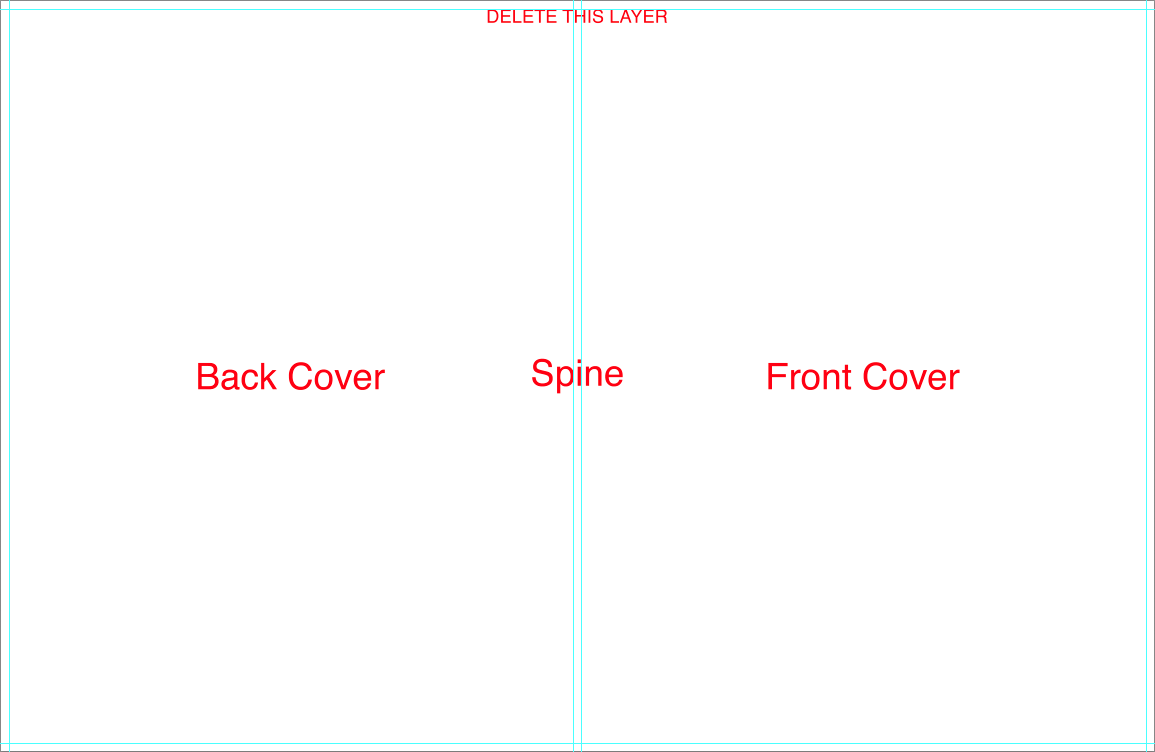
Tip - Designable Book Cover
- The template includes an instructional layer, along with fold and spine guides. Turn off or delete this layer before saving your JPEG file.
- Consider the direction of any spine text based on how the album will be stored ( vertically or lay flat ).
- Place images past the fold guide and aligned with canvas edge for a full bleed effect, or at least 1/4 inch away from the fold guides for a no-bleed effect.
- Place text/logo at least 1/4 inch away from the trim guides.
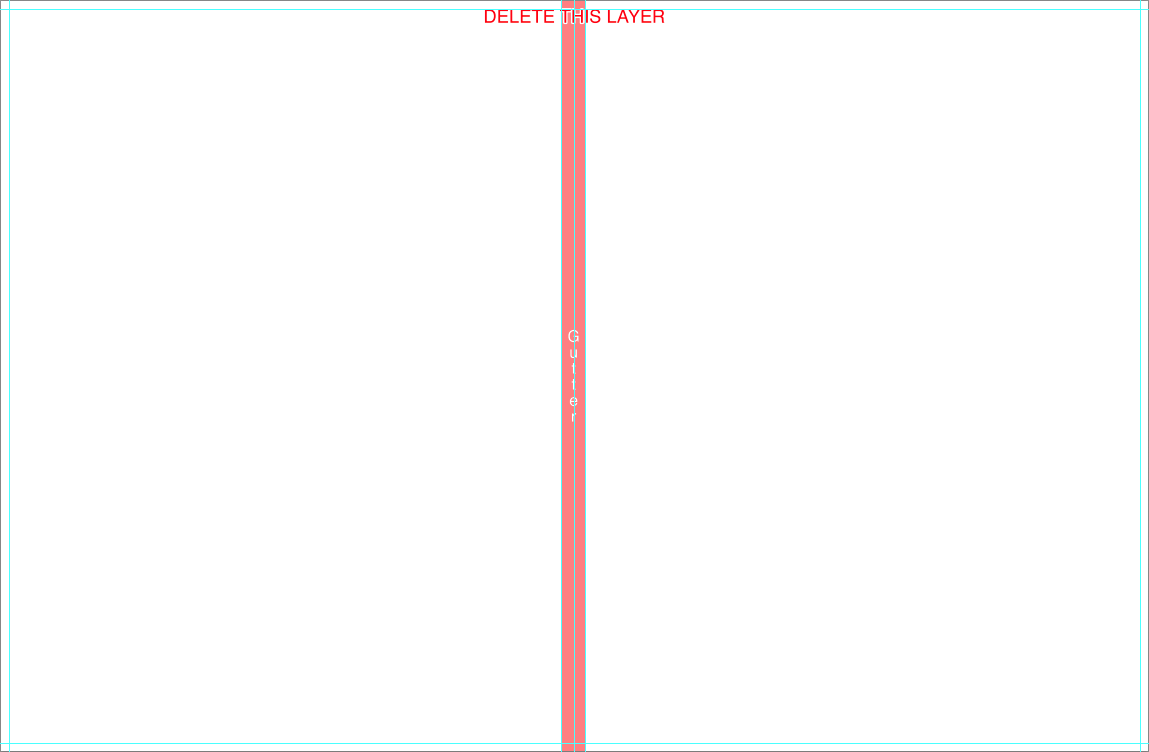
Tip - Pages
- The template includes an instructional layer, along with trim and center guides. Turn off or delete this layer before saving your JPEG file.
- Place images past the trim guides for a full-bleed effect, or at least 1/4 inch away from the trim guides for a no-bleed effect.
- Place text/logo at least 1/4 inch away from the trim guides.
- Do not align images with trim guide.
Folio & Tri Folio
Download - Files for a Folio
- 000000.psd - Cover file
- 000001.psd - Inside folio
Designable Cover
- The template includes an instructional layer, along with fold and spine guides. Turn off or delete this layer before saving your JPEG file.
- The divot is marked by guidelines or a shaded area. It is not recommended to place text, or important parts of an image, on or near the divot area.
- Consider the direction of any spine text based on how the album will be stored ( vertically or lay flat ).
- Place images past the fold guide and aligned with canvas edge for a full bleed effect, or at least 1/4 inch away from the fold guides for a no-bleed effect.
- Place text/logo at least 1/4 inch away from the fold guides.
Inside Folio
- The templates include the center guide and trim guides.
- Place images past the trim guides for a full-bleed effect, or at least 1/4 inch away from the trim guides for a no-bleed effect.
- Place text/logo at least 1/4 inch away from the trim guides.
- Do not align images with trim guide.

Download - Files for a Tri Folio
- 000000.psd - Cover file
- 000001.psd - Inside folio
Tip - Designable Cover
- The template includes an instructional layer, along with fold and spine guides. Turn off or delete this layer before saving your JPEG file.
- The divot is marked by guidelines or a shaded area. It is not recommended to place text, or important parts of an image, on or near the divot area.
- Consider the direction of any spine text based on how the album will be stored ( vertically or lay flat ).
- Place images past the outer fold guide and aligned with canvas edge for a full bleed effect, or at least 1/4 inch away from the fold guides for a no-bleed effect.
- Place text/logo at least 1/4 inch away from the fold guides.

Inside Tri Folio
- The templates include the center guide and trim guides.
- Place images past the trim guides for a full-bleed effect, or at least 1/4 inch away from the trim guides for a no-bleed effect.
- Place text/logo at least 1/4 inch away from the trim guides.
- Do not align images with trim guide.